

Timber Restoration Guide: Bringing Weathered Timber Back to Life
Reviving Outdoor Timber to Former Glory
The process of restoring weathered timber into functional and appealing surfaces requires organized cleaning methods alongside sanding operations and refinishing work. The timber restoration services at Auswood Timber & Hardware assist clients throughout every phase of the restoration process.
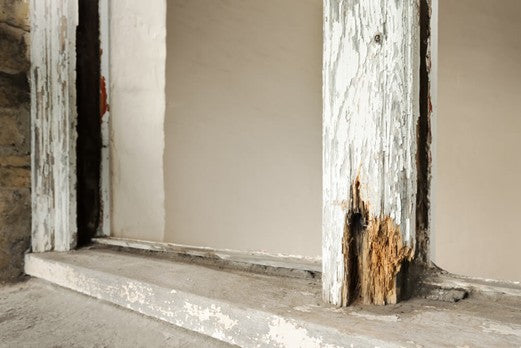
Understanding Timber Weathering
Outdoor timber faces ongoing environmental challenges which impact its survival:
UV Damage
Wood fibers break down when sunlight hits them which results in silvering and surface deterioration.
Moisture Damage
Water penetration causes swelling, checking, and rot development.
Temperature Fluctuation
Wood undergoes thermal expansion and contraction which leads to stress on the material.
Biological Attack
The growth of algae together with mould and fungal colonies causes surfaces to change color while the material starts to break down.
Physical Weathering
The combination of wind and rain along with falling debris creates damage which results in wood surfaces becoming rough and splintered.
Assessment Process
Visual Inspection
-
Check for structural damage or soft spots
-
Identify mould or algae coverage
-
Assess surface deterioration extent
-
Look for rot indicators
Structural Soundness
Use a knife to check the suspicious sections because this approach reveals hidden damage within the material.
Restoration Potential
The presence of deep rot together with severe structural damage requires replacement instead of restoration.
Restoration Process Steps
Step 1: Cleaning (Pressure Washing)
The first stage of pressure washing eliminates all loose debris together with the algae and mould present on the surface. Use moderate pressure—excessive force damages wood.
-
Start at 1,500-2,000 PSI
-
Maintain distance preventing damage
-
Use wide spray patterns
-
Allow thorough drying (24-48 hours)
Chemical Cleaning
For stubborn stains, apply commercial wood cleaner following product directions.
Step 2: Sanding
Coarse Sanding (First Pass)
Rough sanding removes weathered surface layer revealing sound timber.
-
40-60 grit sandpaper
-
Orbital sander recommended
-
Sand with wood grain
-
Remove all discolouration
Medium Sanding (Second Pass)
-
80-100 grit sandpaper
-
Smooth surface preparation
-
Remove coarse sanding marks
Fine Sanding (Final Pass)
-
150-200 grit sandpaper
-
Creates smooth, splinter-free finish
-
Prepares for staining or sealing
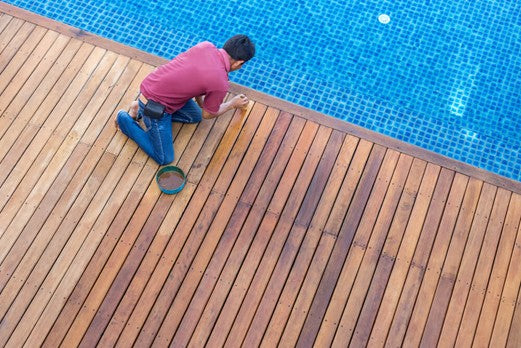
Step 3: Refinishing
Stain Application
Premium exterior stains enhance natural wood colour:
-
Choose quality exterior-grade stain
-
Apply thin, even coats
-
Follow product drying times
-
Apply 2-3 coats for durability
Sealing
Clear sealers protect finished surfaces:
-
Water-based polyurethane (eco-friendly)
-
Oil-based polyurethane (maximum protection)
-
Natural oils (maintain appearance)
-
UV-blocking sealers (extend life)
Finishing Touches
-
Sand lightly between coats
-
Inspect for drips or runs
-
Ensure even coverage
-
Allow full curing before use
Tools and Materials Required
Safety Equipment
-
Safety glasses and dust masks
-
Gloves for chemical handling
-
Hearing protection for power tools
Cleaning Equipment
-
Pressure washer or garden hose
-
Stiff brushes for scrubbing
-
Chemical cleaners (if needed)
Sanding Equipment
Orbital sander or hand sanding blocks
Sandpaper assorted grits
Dust collection equipment
Application Equipment
-
Paintbrushes (quality bristles)
-
Paint roller or spray equipment
-
Mixing containers
Professional vs. DIY Restoration
The restoration process becomes suitable for small projects which have flat surfaces and basic finishes. Labour-intensive but cost-effective.
Professional Restoration
The process requires professional help when you have complicated shapes and big areas needing high-quality finishes. The system delivers superior outcomes through its correct operational methods which produce outstanding results.
Timeline Expectations
Small Deck (100 sq m):
-
3-5 days DIY; 1-2 days professional
Large Structure:
-
2-3 weeks DIY; 5-10 days professional
Weather delays impact timelines significantly.
Maintenance After Restoration
Annual Care:
-
Inspect for damage
-
Clean debris accumulation
-
Watch for new weathering
3-Year Refresh:
Light sanding and recoating extends finish lifespan.
5-Year Renewal:
More substantial maintenance prevents re-weathering.
Common Restoration Mistakes
-
Excessive Pressure Washing
-
High pressure damages wood grain and creates splintering.
-
Inadequate Drying
-
Applying finishes before surfaces dry traps moisture causing failure.
-
Poor Quality Materials
Budget finishes deteriorate quickly in Australian conditions.
Skipping Sealing
Unprotected timber weathering recurs rapidly.
Environmental Considerations
Eco-Friendly Options:
-
Water-based stains and sealers
-
Low-VOC products
-
Boron-based preservatives
-
Natural oil finishes
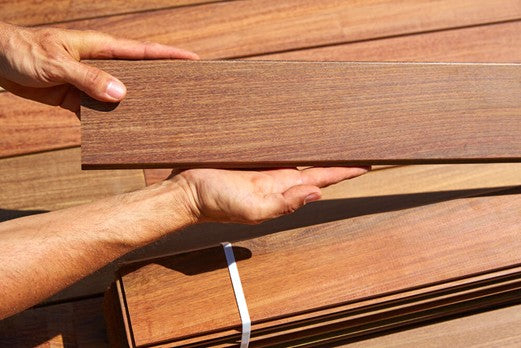
Restoration Material Selection
Auswood Timber & Hardware stocks quality restoration materials:
-
Premium exterior stains
-
Durable sealers appropriate for Australian conditions
-
Sandpaper and equipment
-
Professional-grade applications
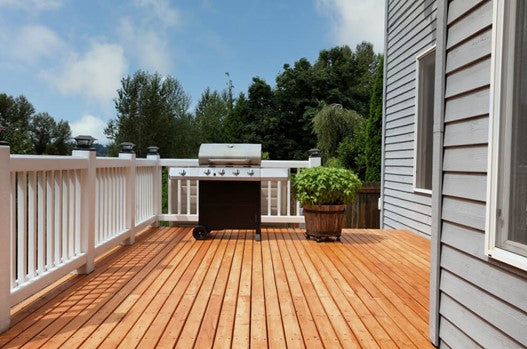
Transform Weathered Timber
The South East Melbourne team offers guidance to clients who want to restore their timber materials. The business offers clients top-notch materials alongside professional guidance which leads to successful project completions.
Call 0499 325 250 for timber restoration guidance or email sales@auswoodtimber.com.au